บทความ
How to make Live Activities and Dynamic Island iOS 16.1
ในงาน WWDC 2022 ได้มีการเปิดตัวฟีเจอร์ใหม่ขึ้นมาที่ชื่อว่า Live activity ซึ่ง Live activity เป็นเหมือน Notification รูปแบบหนึ่งที่อยู่บนหน้าจอล็อกสกรีน ข้อดีคือสามารถอัปเดตข้อมูลได้แบบเรียลไทม์ ยกตัวอย่างเช่น สั่งอาหารจากร้านค้าเราสามารถตรวจสอบได้ว่ามีสถานะเป็นอย่างไรบ้างแล้ว อีกนานเท่าไหร่ถึงจะได้รับอาหาร หรือตัวอย่างหนึ่งก็คือ เราต้องการที่จะดูผลกีฬาที่กำลังแข่งขันอยู่เราก็สามารถทราบผลของกีฬาที่กำลังแข่งขันอยู่ได้แบบเรียลไทม์
ในวันที่มีการเปิดตัว iPhone 14 ได้มีนวัตกรรมใหม่จากทาง Apple ถูกปล่อยมาใหม่นั่นคือ Dynamic Island ซึ่งจะอยู่ใน iPhone 14 Pro และ iPhone 14 Pro Max เท่านั้น โดย Dynamic Island มีด้วยกัน 3 รูปแบบ
Expanded เป็นรูปแบบที่แสดงข้อมูลได้มากที่สุด และเป็นเพียงรูปแบบเดียวที่สามารถเพิ่มปุ่มเพื่อเพิ่มการทำงานอะไรบางอย่างให้ได้
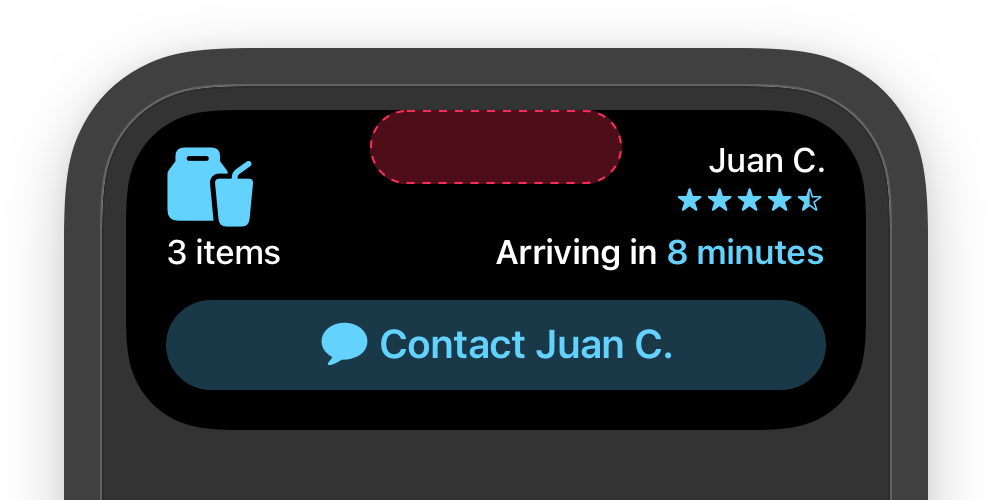
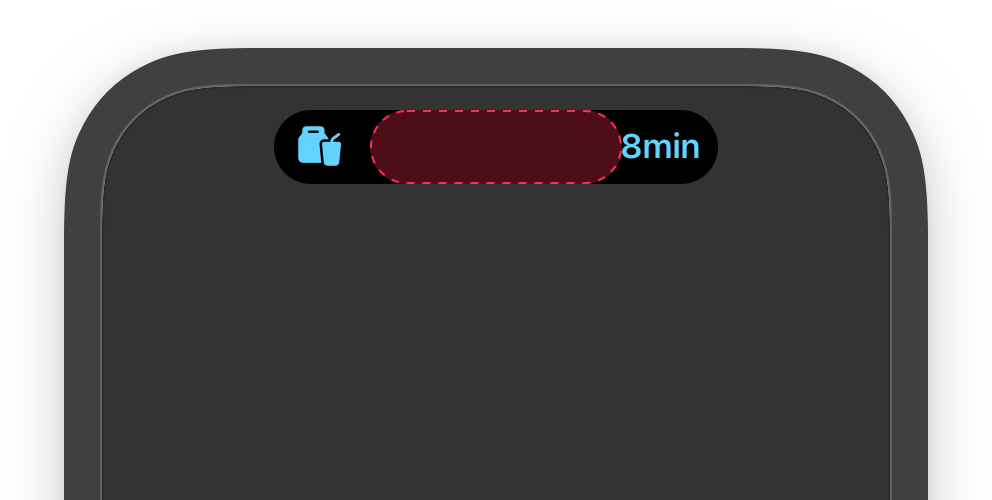
Compact เป็นรูปแบบมาตรฐานของ dynamic island เมื่อมีการเรียกการใช้งาน เมื่อทำการกดที่ dynamic island จะทำการเข้าไปยังแอพที่ทำการเปิด dynamic island
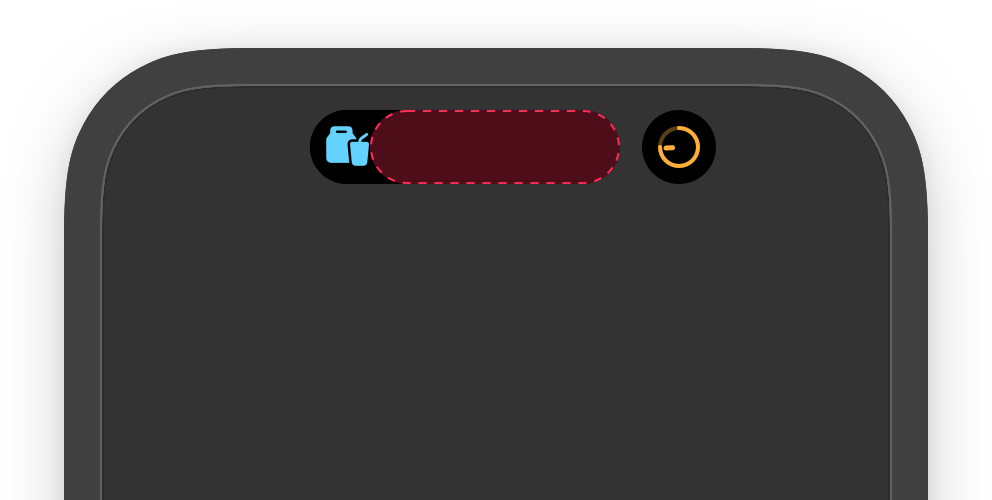
minimal โหมดนี้จะทำงานก็ต่อเมื่อมีการทำงานของ live activity 2 แอพโดย 2 ส่วน
ซ้าย เป็นส่วนที่ live activity ถูกทำงานล่าสุด
ขวา เป็นส่วนที่ live activity ทำงานอยู่ก่อนแล้ว และมีการทำงานที่แอพอื่นเข้ามา
Let’s Start
Step 1
เพิ่ม Widget Extension ไปยังโปรเจ็กต์ของคุณ (File -> New -> Target -> Widget Extension)
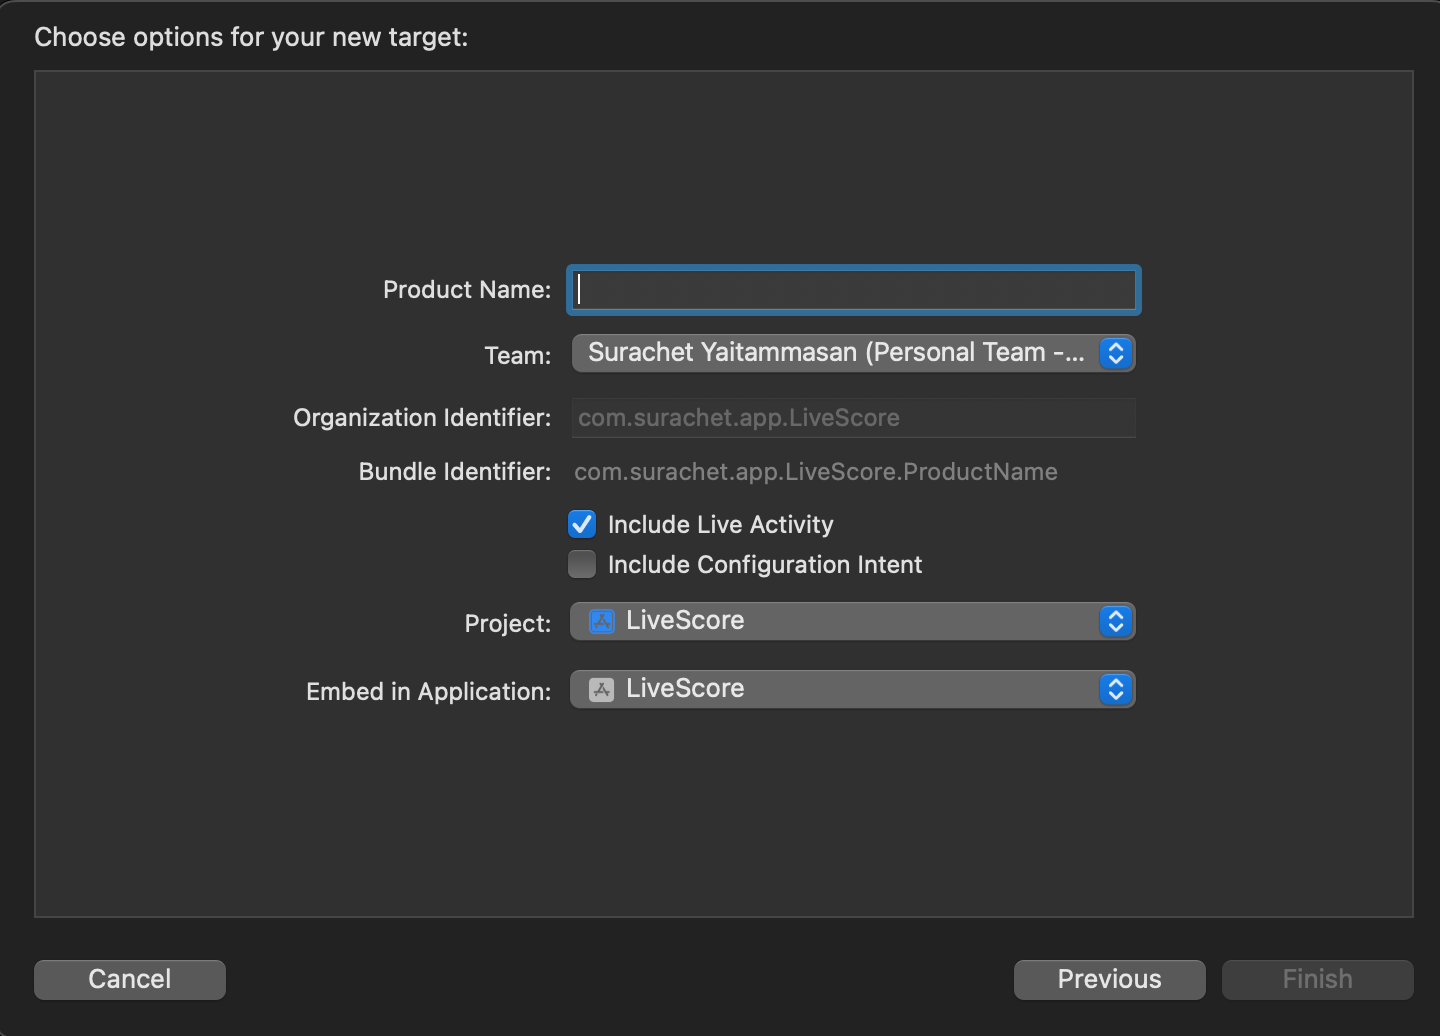
💡 อย่าลืมเช็ค Include Live Activity ถูกเช็คไว้ไหม
Step 2
เพิ่ม NSSupportsLiveActivities ที่มีไทป์เป็นBoolean และต้องมีค่าเป็นYES ใน Info.plist

Step 3
หลังจากสร้าง Widget Extension แล้วเราจะได้ Files ให้เราสร้าง Attributes สำหรับใช้ใน Live Activity
import ActivityKit
public struct FootballMatch: ActivityAttributes {
// ContentState เป็น model ในส่วนที่มีการเปลี่ยนแปลงได้ตลอดเวลา
public typealias ContentState = Score
public struct Score: Codable, Hashable {
let score1: Int
let score2: Int
let information: String
}
// นอกจากที่อยู่ใน ContentState จะเป็นค่าที่ไม่ต้องการให้เปลี่ยนแปลง
let fullNameFirstTeam: String
let shortNameFirstTeam: String
let firstTeamLogo: String
let fullNameSecondTeam: String
let shortNameSecondTeam: String
let secondTeamLogo: String
}
Step 4
สร้างหน้าตาให้กับ Live Activity โดยจะแบ่งเป็นสองส่วนด้วยกัน คือ ส่วนของ Live Activity และ ส่วนของ Dynamic Island
struct LiveScoreWidgetLiveActivity: Widget {
var body: some WidgetConfiguration {
ActivityConfiguration(for: FootballMatch.self) { context in
// Lock screen/banner UI goes here
LockScreenLiveActivityView(context: context)
} dynamicIsland: { context in
DynamicIsland {
// Expanded UI goes here. Compose the expanded UI through
// various regions, like leading/trailing/center/bottom
DynamicIslandExpandedRegion(.leading) {
VStack {
Image(uiImage: UIImage(named: context.attributes.firstTeamLogo)!)
.resizable().frame(width: 70, height: 50)
Text(context.attributes.shortNameFirstTeam)
}
}
DynamicIslandExpandedRegion(.trailing) {
VStack {
Image(uiImage: UIImage(named: context.attributes.secondTeamLogo)!)
.resizable().frame(width: 70, height: 50)
Text(context.attributes.shortNameSecondTeam)
}
}
DynamicIslandExpandedRegion(.bottom) {
Text(context.state.information)
}
DynamicIslandExpandedRegion(.center) {
VStack {
Text("\(context.state.score1.description) - \(context.state.score2.description)")
.font(.largeTitle)
}
}
} compactLeading: {
HStack {
Text(context.attributes.shortNameFirstTeam)
Text(context.state.score1.description)
}
} compactTrailing: {
HStack {
Text(context.state.score2.description)
Text(context.attributes.shortNameSecondTeam)
}
} minimal: {
Image(systemName: "sportscourt.circle")
.foregroundColor(.indigo)
}
}
}
}
private struct LockScreenLiveActivityView: View {
let context: ActivityViewContext
var body: some View {
VStack(alignment: .leading) {
HStack {
VStack {
Image(uiImage: UIImage(named: context.attributes.firstTeamLogo)!)
.resizable()
.frame(width: 70, height: 50)
.cornerRadius(8)
Text(context.attributes.fullNameFirstTeam)
}
Spacer()
VStack {
Text("\(context.state.score1.description) - \(context.state.score2.description)")
.font(.largeTitle)
}
Spacer()
VStack {
Image(uiImage: UIImage(named: context.attributes.secondTeamLogo)!)
.resizable()
.frame(width: 70, height: 50)
.cornerRadius(8)
Text(context.attributes.fullNameSecondTeam)
}
}
Divider()
if context.state.information != "" {
HStack{
Image("ic_information")
.resizable()
.frame(width: 20, height: 20)
Text(context.state.information)
.multilineTextAlignment(.leading)
.font(.body.bold())
.lineLimit(1)
}.padding(.bottom, 8)
}
}.padding([.leading, .trailing, .top], 8)
}
}
Step 5
Starting an Activity
เราเรียกใช้งาน Activity ได้ด้วยเมธอดด้านล่างนี้
static func request(attributes: Attributes, contentState: Activity.ContentState, pushType: PushType? = nil) throws -> Activity
ในกรณีตัวอย่างที่ได้ยกขึ้นมา ผมต้องการที่จะติดตามการแข่งขันฟุตบอลที่กำลังแข่งขันอยู่ ดังนั้นจึงเรียกเปิดการใช้งาน Activity
private func startActivity() {
let attributes = FootballMatch(fullNameFirstTeam: "THAILAND", shortNameFirstTeam: "THAI", firstTeamLogo: "Thailand", fullNameSecondTeam: "JAPAN", shortNameSecondTeam: "JAP", secondTeamLogo: "Japan")
let contentState = FootballMatch.ContentState(score1: 0, score2: 0, information: "")
do {
currentActivity = try Activity.request(attributes: attributes, contentState: contentState)
} catch {
print(error.localizedDescription)
}
}
Updating an Activity
เราสามารถใช้เมธอดดังต่อไปนี้เพื่ออัปเดตข้อมูลให้กับ Activity
func update(using contentState: Activity.ContentState) async
ในแอปที่เราสร้าง จะมีการอัปเดตทุกๆครั้งที่มีข้อมูลสำคัญเกี่ยวการแข่งขันที่กำลังดำเนินการแข่งขันอยู่ ดังนั้นเราจะต้องส่งข้อมูลที่จะอัปเดตข้อมูลที่ใหม่เพื่อไปบอก Activity ดังนี้
private func updateActivity() {
let contentState = FootballMatch.ContentState(score1: 1, score2: 0, information: "Surasak get goal!!")
Task {
await currentActivity?.update(using: contentState)
}
}
💡ในการอัปเดตข้อมูลของ Activity เราสามารถส่งแจ้งเตือนด้วย AlertConfiguration ได้อีกด้วย
Ending an Activity
ถ้าเราต้องการที่จะยกเลิกการทำงานของ Activity เราสามารถใช้เมธอดนี้ในการยกเลิกการทำงาน
func end(using contentState: Activity.ContentState? = nil, dismissalPolicy: ActivityUIDismissalPolicy = .default) async
ในกรณีนี้ เราต้องการที่จะปิด Activity ที่แสดงของการแข่งขันที่เราเปิดไว้อยู่ เราจะใช้เมธอด end(using: , dismissalPolicy: )
private func stopActivity() {
let state = FootballMatch.ContentState(score1: 4, score2: 3, information: "Somsak got hat-trick!!")
Task {
await currentActivity?.end(using: state, dismissalPolicy: .af)
}
}
dismissalPolicy จะอยู่ด้วยกันทั้งหมด 3 ประเภท
immediate
รูปแบบการปิดของ immediate ก็คือระบบจะทำการลบ Activity ลงทันที
default
เราสามารถลบได้เอง หรือ ปล่อยทิ้งไว้เป็นเวลา 4 ชั่วโมงหลังจากที่สั่งปิดการทำงานของ Activity ลง เพื่อให้ระบบเป็นตัวลบ Activity ออกจากหน้าจอให้
after
เราสามารถกำหนดระยะเวลาในการหน่วงการลบ Activity ลงได้ หลังจากที่ทำการสั่งปิด Activity นั้นไปแล้ว
สามารถเข้าไปดูโค้ดได้ที่ด้านล่างนี้
Limitation
ไม่รองรับการดัดแปลงแอนิเมชันเมื่อทำการอัปเดต Live Activity
Live Activity อยู่ได้นานสูงสุด 12 ชั่วโมง
ไม่สามารถเข้าถึง network หรือการรับอัปเดตตำแหน่ง
ข้อมูลที่ใช้ในการอัปเดตต้องมีขนาดไม่เกิน 4kb
Reference
ที่มา:
Medium